
Blisters are an awful part of hiking but they don’t have to be. They hurt. They slow you down. They seem to come out of nowhere.
What really causes blisters? How can you prevent them so you don’t have to deal with that pain out hiking?
What causes blisters?
So what is this little evil thing called a blister?
Blisters happen when friction, and sometimes pressure and moisture, gang up on your foot and try the rub the skin off.
Think of rubbing the skin on a peach. Rub hard enough or long enough and the skin will separate from the peach underneath.
That space in between fills with fluid to help heal the damaged tissue. This separated skin and the fluid underneath creates what we affectionately know as a blister.
Tight spots in our boots, a winkle in our sock, or our heel rubbing up and down all can create the friction over hundreds or thousands of steps hiking to make a blister. Sweaty feet from a hot day or carrying a heavy pack just makes it worse.
So if blisters are caused by friction, pain and moisture, and we take those things away, we should be able to save ourselves the pain of a blister.
Tips to prevent blisters
There are so many different causes of blisters and things we can do to prevent them. I’ve done my best to list many of them here but others might work for you. If something has worked well (or NOT) let us know in the comments so everyone else can learn.
STOP(!) and treat hot spots right away
If you feel a hotspot anywhere in your boot, stop and address it right away. Hotspots turn into blisters. They’ll be a bit sore and red.
Continuing to hike on it is likely just going to make it worse.
It’s awkward to ask to stop every time and figure out what’s going on but its worse to have to hike with blisters.
If it’s just a hot spot, tape it up with moleskin, medical tape, or Leukotape. 2 or 3 overlapping pieces should help. Round the edges os they don’t peel in your socks. Duct tape or bandaids work in a pinch. If the tape help try to leave it on till you get home.
See down below after the tips for how to treat a blister if it’s been left too long.
Try to relace your shoes differently when you get them back on to reduce pressure or rubbing on that spot. See How to lace your hiking boots for tips on different ways to lace boots.
Clean your boots and feet if you can before you put them back on. Often dirt and junk that’s got into your boots are the source of a blister.
Change your lacing
There’s more than one way to lace a boot.
You’re aiming for a snug but comfortable fit where no parts of your foot slide or rub.
Laces that are too tight, might pinch in spots or put your foot to sleep.
Laces that are too loose, let your foot move too much in your boot, rubbing where it shouldn’t.
To lace the top and bottom of the boot differently, put a basic overhand knot before going up the eyelets at the ankle. This lets you lace the foot part of the boot tighter or looser than the leg portion.
To keep your heel from slipping or lace around a sore spot on the top of your feet see How to lace your boots for more options.
Before you go up or down a big hill, try to tighten up your lacing. They can loosen while you hike. Big inclines can cause heel rub. Big declines can hammer your toes into the end of your boots.
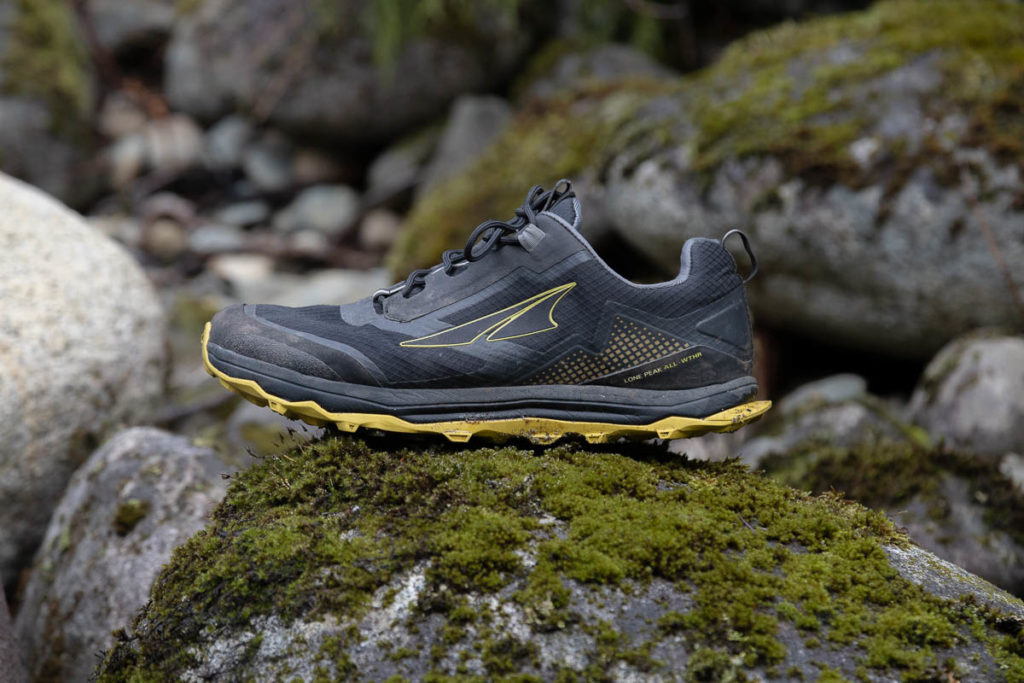
Don’t wear hiking boots at all
I’m not talking about going barefoot, but if that’s your thing, by all means. Less boot to rub.
The heavier and thicker the shoe or boot, the more likely it is to rub.
Wearing light hiking shoes or very light trail runners is even better. They are softer and more comfortable to start and tend not to rub or pinch as much.
Light shoes still need to be broken in. See that in the next 2 tips.
Also see Why lighter hiking shoes and trail runners are often better than hiking boots.
Wear hiking boots that fit well
If you are going to wear hiking boots, make sure they fit well from the store.
For more, see our guide on how to buy hiking boots.
Spend as long as you can in the store testing out pairs and walking around. The more time you spend in them there the better. All boots have different shapes so try as many as you can in a good store where they know the shapes and differences of the boots.
Make sure there are room for your toes to spread out side to side and they aren’t hitting the ends of the boot. You don’t want your foot sliding side to side but toes need to spread out and will expand the longer you hike.
To make sure you have enough room for your toes, slide your foot forward and make sure you can get an index finger behind your heel.
Many stores will have a small incline you can walk up and down on with your hiking boots to see how they feel. Make sure you can comfortably lace them and not have your heel slip up and down. Try placing your feet sideways or diagonal moving around and make sure your feet aren’t sliding sideways either but are comfortably held in place.
Finding a really good fit in the store is half the battle to preventing blisters.
Try never to do long hikes in new boots. Ouch. You’ll need to break them in.
That leads to the next point.
Break boots in
Breaking in a pair of boots is the process of working in the boots to confirm to your feet.
Every boot will be made around a standard mold, or ‘last’, in the factory. That mold might be very similar to your foot or not. But it’s never going to be exactly the same. Through the breaking in process, we want to adjust that boot shape to fit your foot exactly.
The basic process is:
- Get good boots in store by spending a lot of time in them
- Spend time in your boots at home, walking the stairs
- Try errands and more time outside with them
- Short hikes in your boots, slowly increasing moisture, distance and weight you carry
- Your full hike
See a full explanation of the hiking boot break-in process.
Always keep an eye on what socks your wearing, the terrain you’re on and the weight you’re carrying. I find long inclines with a backpacking pack on often gives me blisters with heavier boots.
Break your feet in
Along with breaking in your boots, you have to break in your feet.
If they’re used to walking 2 or 3 kilometers a day in comfortable runners and you want to hike 15 kilometers a day with a 40 pounds pack for your hike, that’s a big difference. It’s like going into the gym and deadlifting 200 pounds right away. Your body needs time to adapt.
The break-in experience above will get your feet toughened up for hiking as well.
Keep Feet Dry
Moist feet will blister faster.
There are usually two causes of moisture:
- exterior (snow, rain and puddles)
- interior (sweat from a hot day, warm feet or hiking hard)
Here’s where things get tricky.
Waterproof membranes like Gore-Tex and eVent keep water out of boots, but they can often make it warmer and trap sweat in.
I like wearing waterproof boots when it’s wet and cold. Any other time I try to use something lighter and ventilated like a trail runner.
The ventilation lets your feet get wet but it also dries faster and cools them down.
Another option if you need to wear larger boots is to try rolling down your socks over the top of your boots. This is called the Chimney Effect and can cool down your feet. Thanks TheBigOutside.com for that tip.
If you know your feet will be wet, foot powder can help. Test before a big hike though as it can clump and cause blisters itself.
Air everything out
Every chance you get, air your feet, socks and boots out. When you have sit for lunch, when you get to camp, when you have a longer break.
This lets your feet, socks and boots dry out. Remember the first point above with blisters. Moisture makes skin softer and more susceptible to blisters.
Bonus points if you can wash your feet in a stream or lake when you take a break. It feels great and cleans off your feet. Remember to dry your feet before getting them back into your boots. That was the whole point of taking your boots off, right?
All that sweat your feet produce is trapped in your socks and boots when you hike, taking them both off gives them a chance to dry out.
Having a lightweight pair of sandals to wear around camp lets your boots, socks and feet dry out even more. These come in handy for stream crossings too.
If you want another way to increase recovery and reduce swelling on your breaks and at camp get your feet elevated. It feels great and it’s a good way to give you legs and feet a rest for the next day of hiking.
Plan for stream crossings
Crossing streams with your boots on just dumps a load of water into your boots. We’re trying to keep those feet dry.
Try to take a separate pair of lightweight shoes or sandals for stream crossings. It’s best to bring something that can be used as camp shoes as well.
Remember to dry your feet off when you get to the other side. A small camp towel or t-shirt works well.
If you’re have the time, taking a break near the stream to soak your feet in the water feels amazing.
Get good socks
Socks are the protective layer between your feet and the tough material of your boots.
The best hiking socks cushion your feet and will wick moisture away from your skin.
Any moisture like sweat or water from rain, will soften your skin, leaving it more susceptible to blisters. Good hiking socks will wick the moisture away from your skin, moving it up to your boots to (hopefully) be expelled out through the mesh or waterproof membrane.
Merino wool or merino blended with synthetic materials make for the best socks. They cushion well but still wick moisture away from your skin. Anything made with merino wool is going to be antibacterial, reducing the stink your socks give off after a day hiking. Pure synthetic will wick faster but stink more too.
Ideally socks will fit snug but not too tight. You don’t want them cutting off any circulation or pinching anywhere but won’t sag or bunch up in your boots.
For thickness, something that is just warm enough for your feet is good. Thick socks in hot weather will make your foot hot and sweaty. It will take some experimentation to see how thin of a sock you can use with your boots. Use thinner socks for warmer weather and lighter boots and shoes. Bigger boots and colder weather will require thicker socks.
Make sure your socks are high enough that your boots won’t touch your skin anywhere. That will rub the skin right off.
Never wear cotton socks to hike in. They do the opposite of wicking absorbing water, keeping it against your skin. That’s the last thing you want.
Liner socks
Liner socks are thin, often synthetic, socks to wear under your hiking socks.
Being synthetic, they wick moisture faster than a wool or wool blend.
But the main reason for having a thin liner sock on is to provide a rubbing layer. When your foot moves inside your boot, friction happens between the 2 sock layers instead of between your foot and a sock, reducing the chances of a blister.
Some people have success with this one, others don’t. I find it makes my feet too warm in all but the coldest conditions and can have issues bunching up.
Experiment with it and see if you can get it to work. A thin liner sock and a thin hiking sock might work.
There are double-layer socks you can buy that have the 2 layers built right in as well.
Try Toe Socks
If you get blisters between your toes you might benefit from toe socks.
Like toe shoes, toe socks have fabric around each of your toes. Instead of rubbing skin together in between toes, the fabric just rubs together.
Injinji makes good toe socks. There are also liner socks of the toe kind.
Cut toenails
This one isn’t necessarily a tip just for blisters but all of hiking.
Long, sharp toe nails can dig into your other toes and into the inside of your boots. Trim those nails up before a hike with nice rounded corners and your feet will thank you.
Change socks throughout the day
Wet socks lead to blisters. If your feet are getting wet from wet boots or sweat, it might keep them drier to swap out socks regularly.
If you have a couple pairs, you can swap the wet pair for a dry pair at lunch or on a break. If the weather is dry and warm, you can pin your socks to the outside of your bag and dry them out for the next swap.
Having another dry pair for in camp feels great and helps dry out your feet as well. Airing out your feet at camp a bonus.
Upgrade insoles
The insoles that come in most hiking boots are very basic, thin, with little support.
Adding better insoles to your boots can improve the fit.
Thicker insoles can take up extra space in your feet so they fit more snug. The less extra space in your shoes the less your feet with move. If you are in between sizes, insoles can take up that extra space too.
An added benefit is that you can get the exact amount of arch support you need from your insoles. Most stores will have a heat activated pad you can stand on that shows how high your arches are and what model insole you’ll need.
Superfeet and Sole insoles are great options.
Anti-chafing products
Wearing socks and boots that fit so well they don’t chafe is the goal.
Sometimes that’s just not possible and we need a little extra help. Sometimes you need to get home from a long hike with a blister or the mileage that day is larger than normal.
Some products let your foot slide a little better against your sock and boot. Products like Body Glide, Hike Goo and Vaseline reduce the friction. Vaseline can be a bit messy but in a pinch it’s better than a blister. These products often wear off with hiking and sweat so reapply as you go.
Another type of product that is new to the market is Wuru Wool Blister Wool. It’s a small clump of merino wool you can place in an area that rubs if you are going farther than usual or are getting a hotspot. The Blister Wool absorbs moisture and provides extra cushion and less friction on your skin.
Another option is products like Gold Bond powder that decreases the moisture and friction against your skin. Take care of this one as it may clump and cause other blisters.
Tape problem areas from the start
Some spots may just cause problems regularly. For me long inclines with a heavy pack or 20+ kilometer days usually cause problems with hotspots and blisters.
If you know of problem areas for you and you’re headed into blister territory, pre-tape.
Heels, balls of feet and toes are common areas for blisters.
Some people can just get away with a bit of medical tape. Sometimes the hike will need Moleskin with medical tape over top. Leukotape is a stickier medical tape that’s used in physio and sports.
Add the padding layer on first and then the stickier medical or Leukotape. Trim the corners so they dont’ roll up in your socks. Duct tape can work too. Its smooth face makes it easier slide.
Keep feet and boots clean
Dirt and crud from the trail can be the cause of some of your blisters. Don’t give them a chance to start. Clean your boots, socks and feet as often as possible and if you feel anything in there, stop and clean it out. Don’t walk on it any longer than you have to.
If your feet are wet after cleaning them in a stream or lake, don’t forget to dry them off as much as possible. A small pack towel is great for this.
Wear gaiters
To help keep the dirt out, gaiters are like jackets for your legs that fit over your boots or shoes.
They can be tall and waterproof for muddy, cooler hikes. There are also short, breathable options that can fit over trail runners.
They work on any trails specially sandy areas like the desert or beach.
Treating Blisters
Pop or not?
Everyone will have their own opinion on popping blisters.
At the end of the day, it’s best to keep them closed and treat them at home. But that’s not always possible. The risk is small, but you don’t want them getting infected on the trail.
Blisters can be painful to walk on and they might just end up popping on their own.
If they are likely to pop on their own in a dirty, sweaty sock, then best to do it yourself and control the cleanliness.
The first step is to see if you can keep it intact but pad around it.
Pad around the blister
For smaller blisters you might be able to walk on it with a bit of padding
Cut a piece of moleskin or molefoam with a hole it in for the blister, leaving a bit of space around it. Cover with another piece of moleskin for padding. Cover the whole thing with medical tape, Leukotape or duct tape. BandAid and Second Skin also have blister pads that might work for you.
See how it feels to walk in it.
If it’s just too painful to walk on, it might be one you have to pop. Heel blisters are a tough spot to hike on.
Popping and Cleaning
If all else fails and you can’t walk on it then draining and cleaning is your best bet.
It’s best to pop and clean in a controlled environment than a sweaty, dirty sock.
- Clean area with alcohol, antiseptic wipe, or soap and water
- Sterilize needle, knife or pin with fire, alcohol or boiling water
- Make small hole in bottom and push fluid out. Try to keep the top in place to prevent infection and sensitive skin covered. Make the hole big enough that it won’t close right away.
- Clean with antibiotic ointment like Polysporin and dress like a would with gauze or bandaid
- Add tape or moleskin if padding needed. Don’t put sticky tape right on blister as it will rip the skin off. You can cut molefoam or moleskin in donut for popped blister too. Add antibiotic ointment in the donut if you like.
Keep an eye on it and keep it clean. Redness, pain, puss, or red streaks means its infected and needs to be addressed asap.
Blister First Aid Checklist
So we’ve gone through all the steps to prevent those blisters and treat them if you do get one. That included a few things. Here’s a list of the things that were used:
- Moleskin or molefoam
- duct tape (wrap around something clean)
- multi-tool with scissors, tweezers and small knife
- Medical tape, KT tape or Leukotape
- Bandaids (waterproof are stickier)
- Small folding scissors
- Alcohol wipes or soap
- Polysporin
- Sewing needle
- Gauze or Blister bandages
- Optional
- Nail clippers
- Anti-chafing balm
Experiment with what you like to use and works best on your feet and boots.
Out on the trail, it’s nice to have blister stuff accessible to it’s easy to address hotspots quickly without emptying your entire bag.
Beware of these methods
Some of the methods to prevent blisters above just aren’t going to work for everyone. You’ll need to experiment.
Some methods just don’t work as well.
Putting deodorant all over your feet. Deodorant is likely just going to irritate your feet.
Using foot powder. Some people recommend it but we’ve seen comments about foot powder clumping and creating more blister issues.
Comment your Tips!
Got any blister tips, used one of these before with success or failure?
Got a disaster story with something NOT to use?
We’d love to see your comment below?